SMM Panel Tutorial: Set Up Your Panel Step by Step (Video)
To set up an SMM panel on Jeskie Rental, create your panel, connect services from Jeskie Panel, set your prices, choose how your customers pay you, add your logo, connect your own domain and turn on WhatsApp alerts. The video below shows every step on real screens, and the steps after it match it, so you can watch, pause and follow along.
How to Create Your SMM Panel Website: Step-by-Step SetupCreate your panel, connect your services, set your prices, choose how customers pay you, make it yours and share your link. Every step on screen, from sign-up to the first order.8 min video
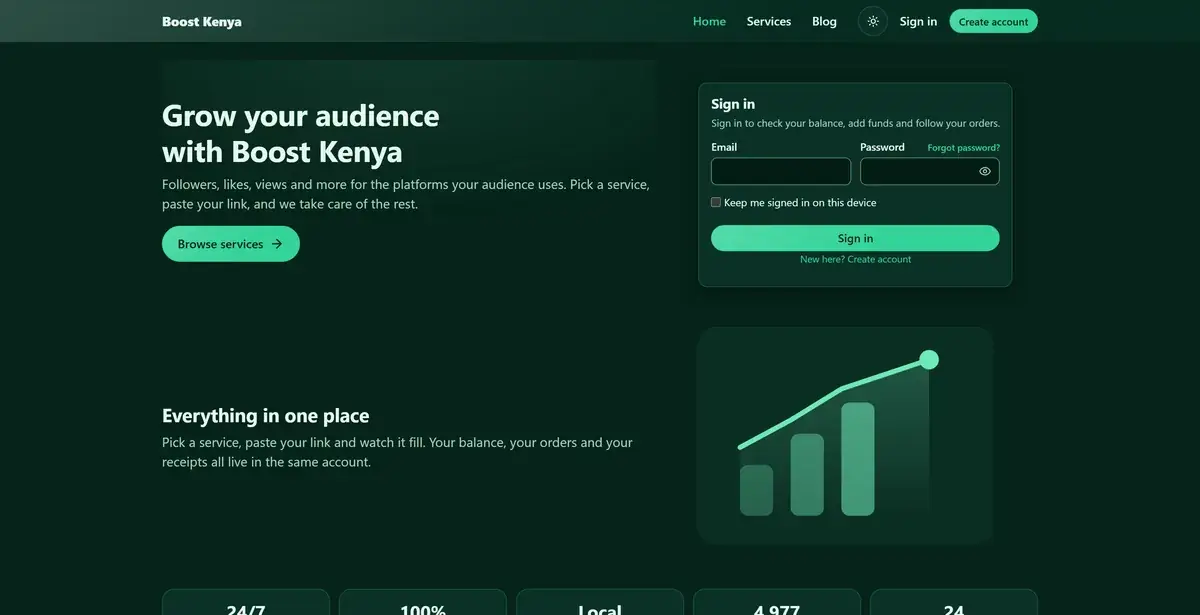
Your panel's home page: your name, your services and a sign-in box for your customers.
Your panel starts on a free address from us, and your own domain, such as yourbrand.com, is recommended: customers trust it and search engines list panels on their own domain.
Already have a domain? Use it, wherever you bought it. If not, buy one from any domain company. For example, on Cloudflare a .com costs about eleven dollars a year. Read more on getting a domain for your panel.
On Jeskie Rental you connect your domain in your panel's admin: open Settings, then Your own domain, type your domain and press Use this domain, add the two records shown at the company where your domain is, then press Check now.
In your admin open Settings, then Your own domain. Type your domain and tap Use this domain.
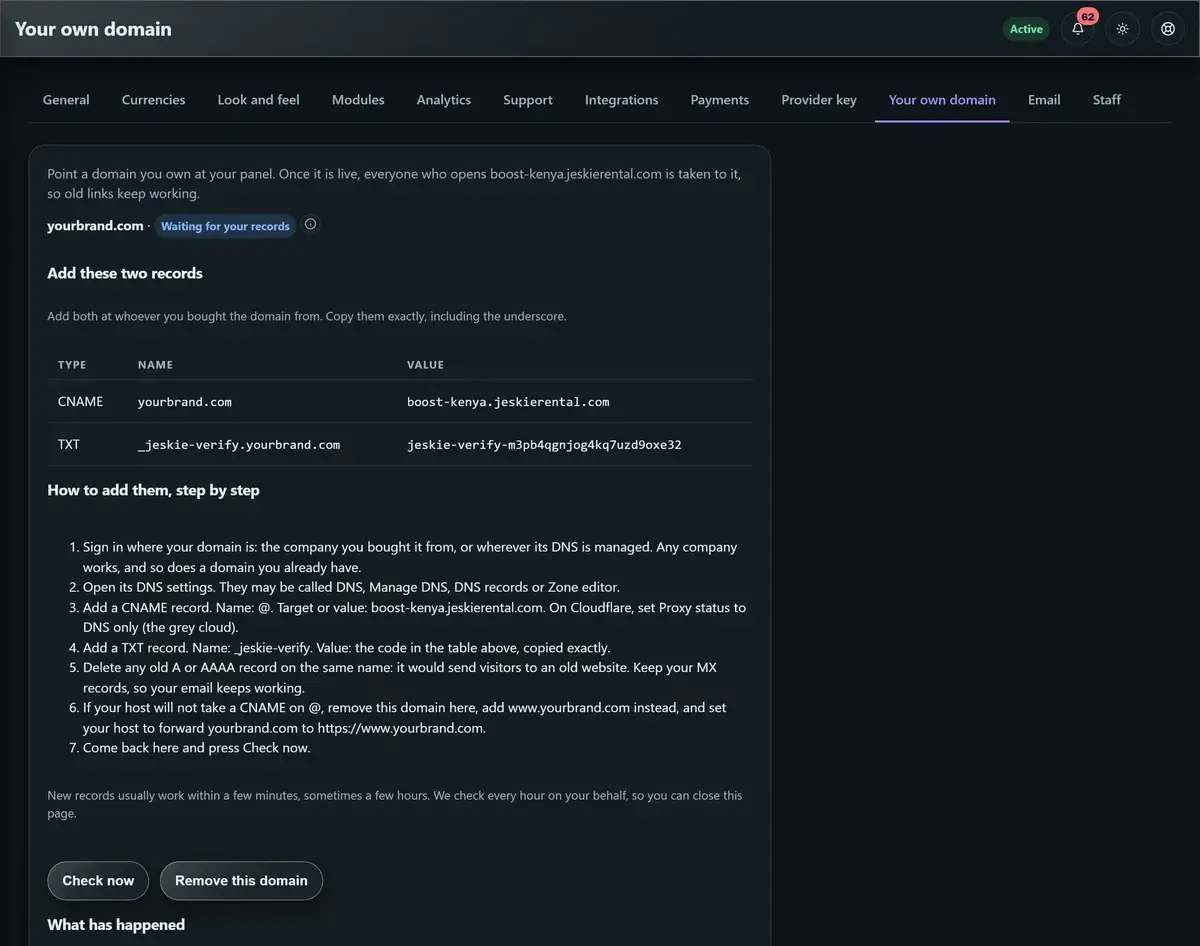
We show you two records to add, a CNAME and a TXT, with the steps right under them. Keep this page open.
Your own domain: the CNAME and TXT to add, and how.
Sign in where your domain is and open its DNS settings. Some companies call them Manage DNS or Zone editor.
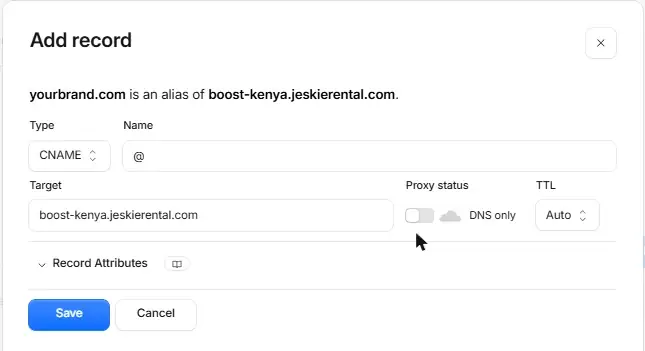
Add a CNAME record. For the name type @, and for the target paste your panel's free address. On Cloudflare, set Proxy status to DNS only.
The CNAME at your domain company, here on Cloudflare.
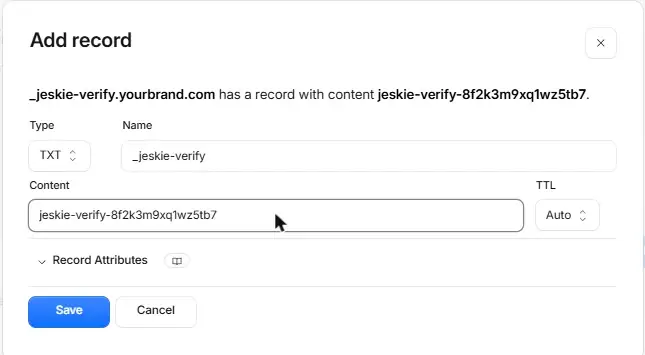
Add a TXT record. For the name type _jeskie-verify, and for the value paste the code from your panel.
The TXT record with the code from your panel.
Delete any old A record on the same name. Keep your MX records, so your email keeps working.
Add a second CNAME with the name www and the same target, so anyone who types www reaches your panel. If your company will not take a CNAME on @, add the A record your panel shows instead.
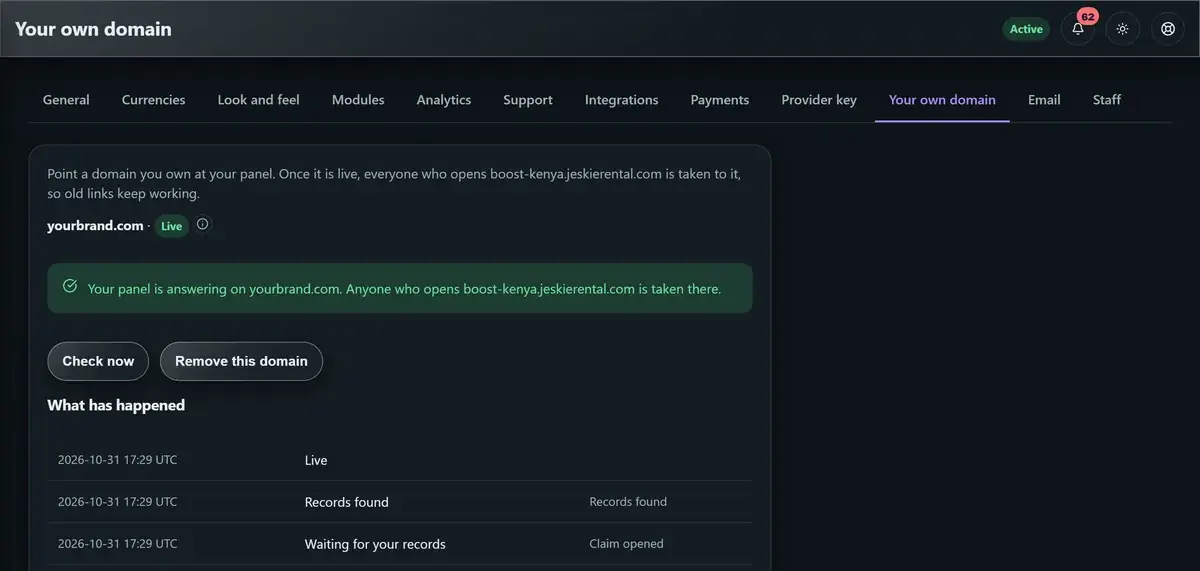
Back in your panel, press Check now. Most domains are live within an hour, and the padlock is added for you.
Live: your panel answers on your own domain.
Once your domain is live, anyone who opens your old address is taken to it, so links you already shared keep working.
Step 8: Turn on WhatsApp alerts and talk to your customers #
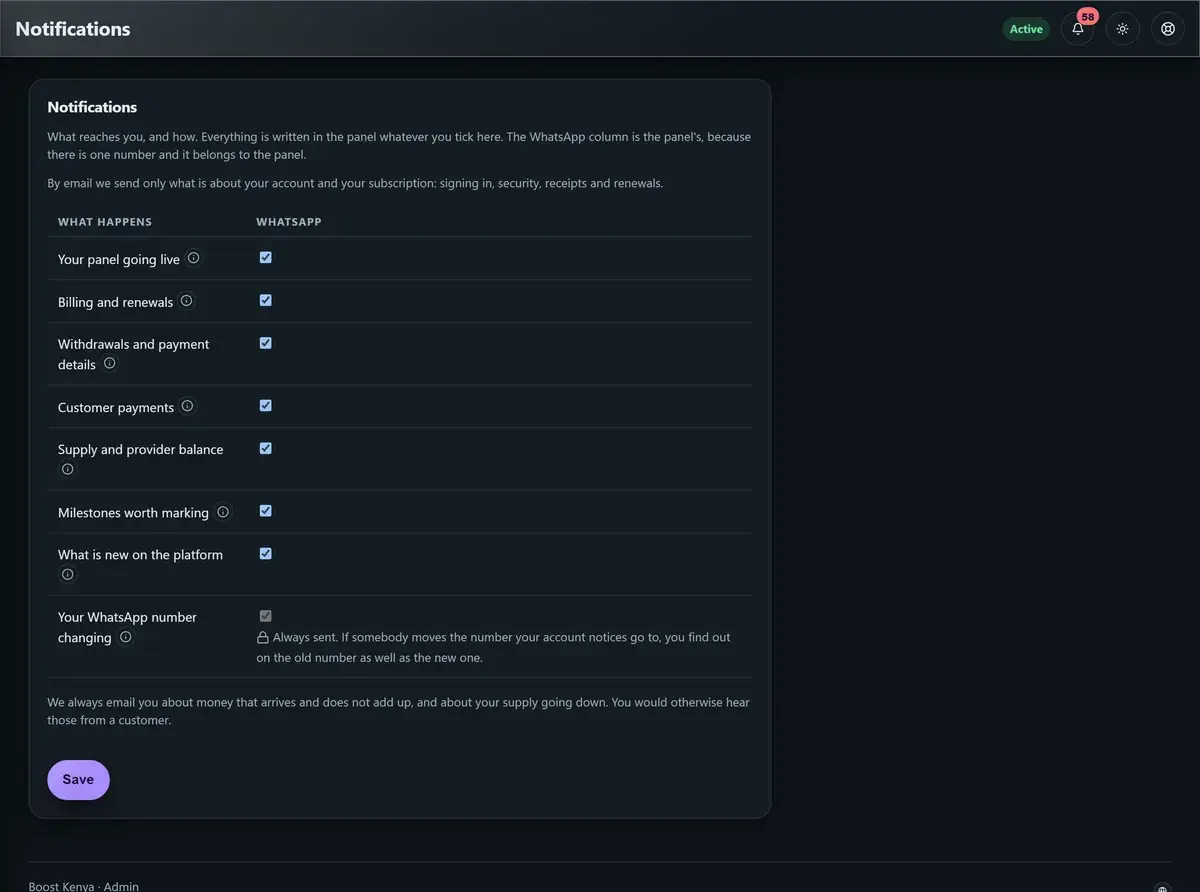
We message you on WhatsApp the moment something matters: a customer pays, a renewal is coming up, your service balance runs low or you reach a milestone.
Notifications: untick anything you do not want on WhatsApp.
Add your WhatsApp number and a chat button appears on your panel. Customers can also open support tickets and read your updates. To sell more on the app your customers already use, read how to sell SMM services on WhatsApp.
Step 9: Share your panel and take your first orders #
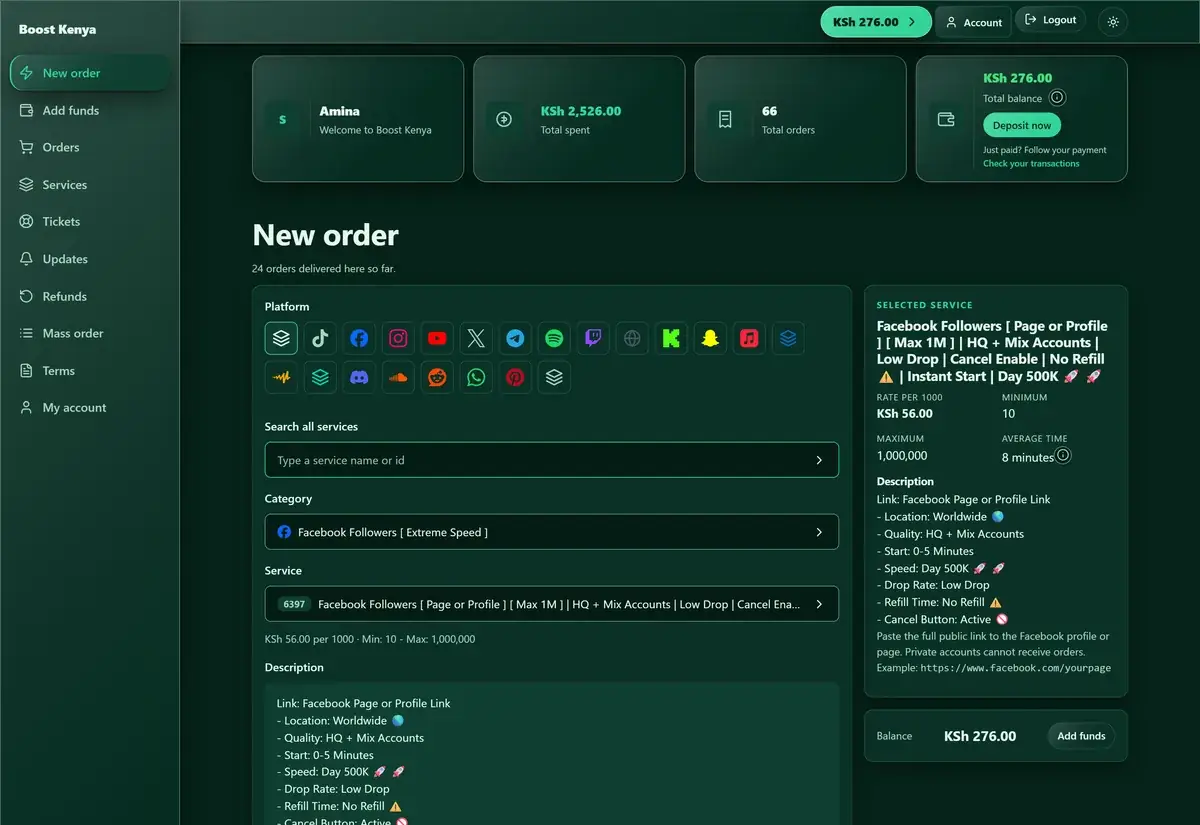
Share your link in your WhatsApp status, your groups and with your contacts. Your customers pick a platform and a service, paste their link, choose how many and place the order. It starts on its own and their receipt is ready at once.
Your customers' order page: platform, service, link, quantity.
Step 10: Pay your plan, and get your second month free #
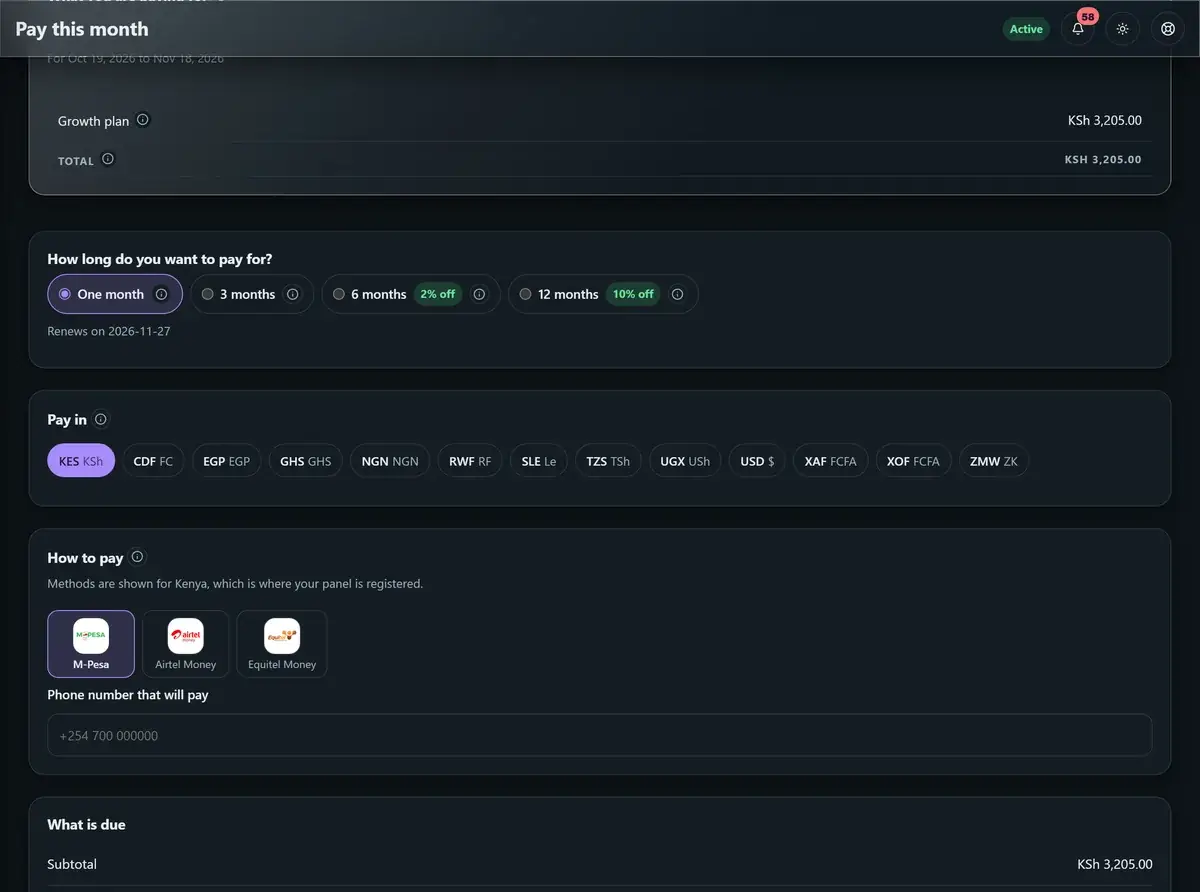
When your free days end, pay your plan from your admin: pick how you pay, enter your number and approve the prompt on your phone. Pay your first month and the next month is free, while your panel picks up customers. See the plans.
Pay this month: pick your network, enter your number, approve on your phone.
Your blog brings buyers, set up to rank on Google and to be found by AI assistants. Every customer sees prices in their own money. Passkeys let you and your customers sign in with a fingerprint or Face ID. Support is from real people on WhatsApp, around the clock. And your panel is not limited to your town, or even to Africa: serve customers near you and promote it across the continent and beyond. See everything a panel includes and how it works, or try the demo panel.
Setting up your SMM panel on Jeskie Rental takes seven steps: create your panel, connect services, set prices, choose how customers pay you, make it yours, connect your own domain and turn on WhatsApp alerts.
Services come from Jeskie Panel: paste one API key and thousands of services appear, and every order is delivered automatically while your balance is topped up.
Customers pay you directly by mobile money, bank or crypto, and you keep the difference between your price and the service cost.
Your own domain takes about ten minutes: two records at your domain company, then Check now. Any company works, and so does a domain you already have.
Your panel works for customers near you and anywhere else: promote it across Africa and beyond.
Frequently asked questions
How long does it take to set up a panel?
Most owners have a panel taking orders in under an hour: a few minutes to sign up and confirm your email, a few to connect services and set prices, and the rest on your payment details, your logo and your first post on WhatsApp.
Do I need my own domain?
No. Your panel starts on a free address made from your business name, and that address works on its own. Your own domain is recommended because customers trust it and search engines list it, and you can add it at any time.
How do I connect my domain on Jeskie Rental?
In your admin open Settings, then Your own domain, type your domain and press Use this domain. Add the CNAME and TXT records shown at the company where your domain is, then press Check now. Most domains are live within an hour, with the padlock added for you.
Can I set up and run my panel from my phone?
Yes. Every step in this tutorial works on a phone: your admin, your settings and your customers' panel. Your panel keeps taking orders while your phone is off.
Which mobile money can my customers pay with?
Mobile money across Africa, including M-Pesa, MTN MoMo, Airtel Money, Orange Money and Wave, plus bank transfer and crypto. You choose the ways that suit your customers, and you can confirm each payment yourself.
Can I set my own prices?
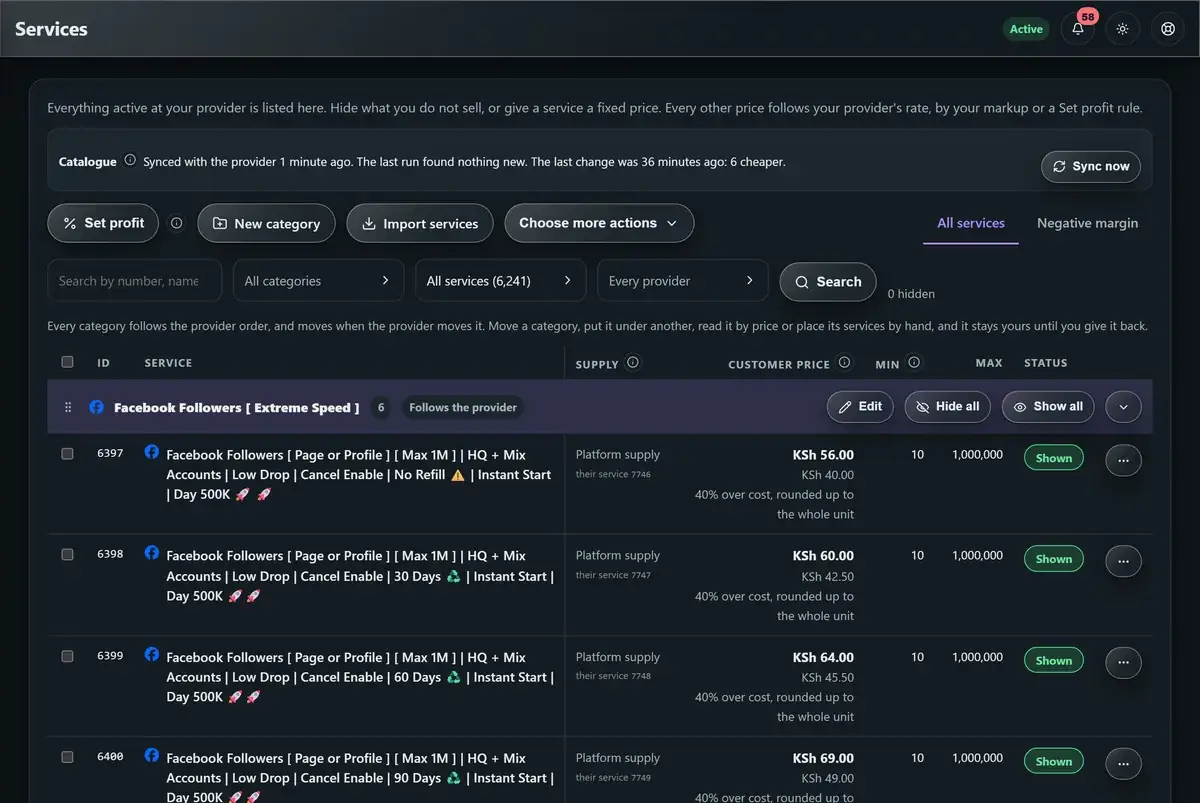
Yes. Add your margin to every service at once with Set profit, give any service a fixed price, or hide the ones you do not sell. Your customers see prices in their own money.
Is this the same as a child panel?
No. A child panel runs on another panel's services under its rules. A rented panel is your own website, under your name and on your own domain, with your own prices and payment methods.
Is there a French version of the video?
Yes. The same tutorial is in French, with the steps for francophone countries and their payment networks.
Start your own SMM panel
From $10 a month
A ready panel with the services included, your name on it and your prices in your currency. The first 3 days are free.